Table of Contents
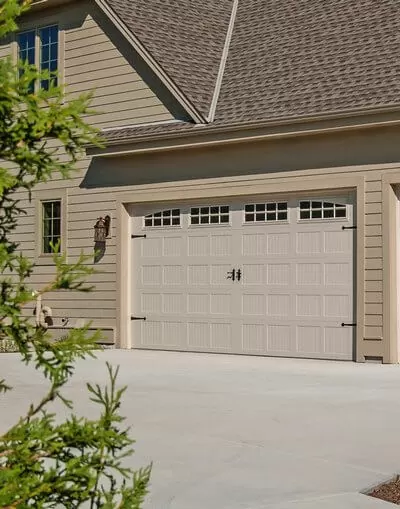
Panels give garage doors a complete appearance. However, just like any other part of the garage door, they may suffer damage over time. Panels may break or become discolored, which will give the garage door an ugly appearance. If you notice damage, you can easily change garage door panels. Actually, replacing garage door panels doesn’t have to wait until there is damage. Changing panels before you have significant damage helps you avoid costly replacements.
So how do you go about that? Can you do it yourself? How much will garage door panel replacement in Crofton, MD, cost? Keep reading to learn how to replace garage door panels by yourself.
When Your Garage Door Panels Need to Be Replaced
Garage Door Service
Before you get to work, it is good to know when to replace garage door panels. There are many reasons why the panels need to be changed. It is common for panels to have some dents: the most common cause of panel damage is when a car accidentally hits the garage door. But there can be other factors too: stormy weather or hailstone, physical objects like balls can cause a dent in the panel.
What you have to know is that leaving a small dent will over time lead to further damage. So it is better to get a garage door panel replacement before the damage becomes extensive. The longer you leave the panels unchanged, the higher the risk of damage to the opening system. The door might get stuck when opening and even become misaligned. To prevent further damage, it is best to change the garage door panels.
You might ask, “Isn’t it cheaper to repair the panels instead of replacing them?” While it is cheaper to repair the panel, you have to consider the extent of the damage. If the dent is tiny, fixing it would suffice.
If we talk about the door opener system, it is wise and efficient to change a garage door opener instead of trying to repair it, especially on your own.
However, if you have large dents or repeated damage despite repairs in the past, it is a clear indication that the door panel should be replaced immediately. When deciding, think of how long you have had the panels. If you have doors older than 20 years, replacing the entire garage door is the best move.
Should you replace the panels by yourself or hire a professional? Changing the garage door panels is easy, so you can try to do it yourself. But put safety first. It is pretty easy to injure yourself as you work. So take safety measures like using a ladder or clamp to keep the garage door in place as you work. If you are still not comfortable changing the garage door panels yourself, call up a professional. STI Garage Doors is always ready to help you change the panels of your garage door.
The Main Tips and Tricks for Replacing Garage Door Panels
How can you replace garage door panels? Here is a simple step to step guide that will help you with how to replace garage door panels.
Before you get started, buy the garage door panels. You can either get them from the manufacturer of your garage door or other providers. Companies that sell garage doors usually have different kinds of panels too. So finding one for your door shouldn’t be difficult. You should also switch off the power to the garage door opener while replacing panels.
1. Take measurements
Before you buy new garage door panels, take measurements. This will prevent you from wasting money on panels that won’t fit your garage door. You need to take two necessary measurements: the width and the height of the door. Before you measure, lower the door. This will allow you to take accurate measurements.
2. Remove tension springs
To remove the tension springs, first lower the door. Because there are different garage door panels, the way you remove the panels may differ. For some doors, you have to remove the springs in the up position and others in the down position. If your door has tension springs, you should remove them in the up position. Doing this allows you to get rid of any tension when removing garage door springs.
With the door in the up position, it is safe to remove the springs. Once it’s done, the door can fall to the floor if there is nothing to keep it in place. So you can put a clamp on the garage door to prevent this from happening. Once the tension springs are out, slowly lower the garage door.
3. Remove the panels
Start by removing the center brace. To do this, simply remove the pin, and the brace will become loose. Next, loosen the nuts on the panel at the top of the garage door. Work your way around the panel until all the nuts have been removed. Continue the same process until all the panels are removed.
4. Remove old tracks
When changing the garage door panel, you have to remove old tracks. To do this, remove the brackets that keep the tracks in place. Make sure the rail is firmly held in place as you attempt to remove the brackets. Once you have removed the tracks, also remove the sensors because they prevent the garage door from closing when there is an object underneath the door. At this point, you should also disconnect the operator. Open the brackets and remove the wires on the motor. If you are replacing the garage door panel alone, use a ladder to rest the motor.
5. Level the door
Before you level the door, check the frame. This is essential when performing a garage door bottom panel replacement. Make sure the frame will accommodate the new panels. Now it is time to level the door. Doing this is a good way to ensure that the new panels fit the garage door. The bottom of the garage door should be able to fit properly on the floor. You can use a compass to check whether the bottom of the garage door and concrete floor correspond.
If they don’t, you can trim away the bottom until they fit. Before trimming, it is better to mark a line. Then trim slowly so that you don’t remove more of the panel than you originally intended to. Always do this regardless of the kinds of garage door panels you want to change.
6. Put weather stripping
To complete the bottom panel replacement, install the weather stripping. You can use galvanized nails to put the weather stripping as these can withstand harsh weather conditions. Keep in mind that even galvanized nails and weather stripping can suffer damage over time. So replacing them regularly is important as well.
7. Attach brackets
The next step is to put the corner brackets. Brackets are usually labeled with an R for right and L for left. That way, you will know which bracket to install so that you avoid any mistakes. When placing brackets, make sure that they are right at the bottom of the door. With brackets in place, hold them in position with screws.
8. Put hinges
You now want to build your hinges, which is very easy. Hinges are usually numbered at the bottom, so you know where to start. The first hinge will be marked with only one. The second will have twos and one at the center. The hinge for the bottom panel is placed at the bottom.
9. Put the rollers and tracks
With the bottom hinge in place, it is time to install the rollers. Put rollers on the bottom hinge. When placing tracks, begin with the ones on the bottom wheels. Even though brackets keep the tracks attached to the wall, it is always better to attach the tracks towards the end. It is pretty easy to attach the rollers to the flexible track.
10. Change the panels
At this step, make sure all your garage door hardware is closed. First, you have to assemble the torsion rods. When changing garage door panels, always follow the instructions from the manufacturer’s manual. The springs are strong, so it might take some time for you to put the panels. Each panel fits over the groove of the lower panel. So the roller will slide below each panel as you install it.
When you are sure that the rollers are in place, tighten the tracks with screws. Now you can also connect the horizontal and vertical tracks. These two tracks need to be correctly aligned to prevent the door from being misaligned. Connect the tracks tightly on both sides of the garage door.
11. Put in the end bearings
The function of the end bearings is to provide a place where the torsion rods can spin. These are easy to install when changing the garage door panels. End bearings are installed outside. The hex head should be installed at the bottom while the bolt goes at the top. Make sure they are installed properly and tightly.
12. Tighten hinges
Once only one panel is left, you can set the power unit on the frame. Set the last panel in the tracks and tighten it with screws. Place the bracket at the center and tighten it with screws as well. Use hardened screws at this point as they are stronger and last longer. The bracket should be level and not too tight. This will give you more room to make adjustments. You can now proceed to tighten all the hinges of the garage door.
13. Put cables and springs
With the hinges secured, you now have to place the cable. The cable is the main part that will pull the door up when you open it. The cable should be attached to the bottom panel. To do that, pass it through the winder and tighten it. When you feel it is tight enough, tighten the screws. Put the springs as well, making sure they are tight enough too.
14. Install the operator
The new system operator should be placed once you have secured the cable springs. First, install the brackets that should hold the operator. You have to install a few more brackets that will hold the motor of the system operator. Also, attach the bracket that will keep the springs. Once you connect the rail of the operator to the bracket, you can now mount the motor in the right position.
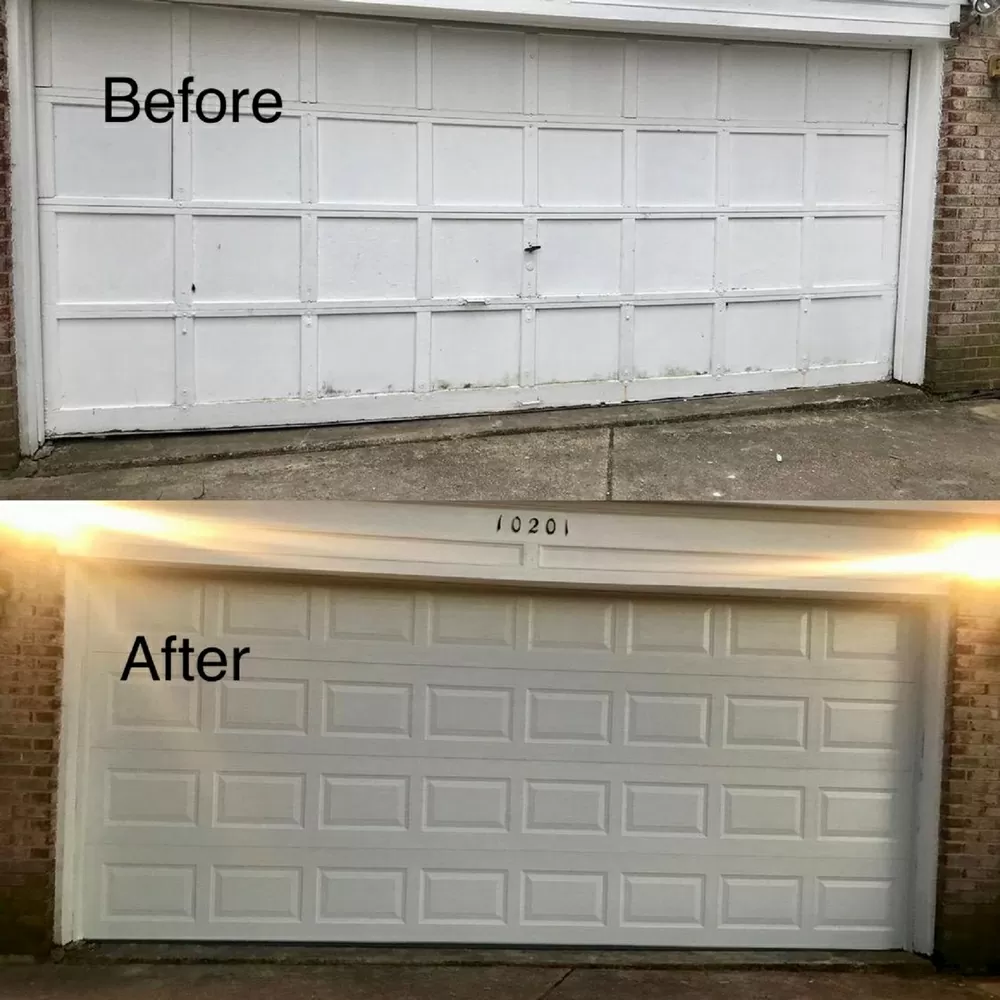
15. Paint the panel
Once the new garage door panels have been changed, you can now paint it. Take your time when painting so that you get the best results. You can trim the panels before painting them, as this will give it a cleaner finish. Because the panels are new, the color may not match that of the garage door that has been exposed to heat and moisture. Repainting the garage door will give a uniform color and appearance. With this final step, the garage door will look brand new.
Cost of Repairing
Garage Door Service
Repairing dents in the garage door doesn’t cost much. However, it might not be the solution you need if the panels have been badly damaged.
Several factors determine the cost of repairing the garage door panels. These include:
- The extent of damage
- The cause of the damage
- The lifespan of your garage door panels
So when you finally decide to replace the door panels, how much will it cost? For example, replacing garage door panels in Olney, MD, usually costs about $100 to $1,200. This is the usual price for new panels. The cost of labor is about $150 to $500. Ultimately, the price will depend on the type of panels you have and the company doing the work. The cost to get new panels may be slightly higher, but it is worth it in the end. You will save more than having to replace the entire garage door.
Consider STI Garage Door Your Trusted Partner
When you need help on how to take off garage door panels, STI Garage Door is the company to call. Our company has been removing and replacing garage door panels for years.
Removing garage door panels is more affordable when you work with us. We have worked with so many homeowners and know how to fix any damage on garage door panels. Our professionals can replace different panels and help you avoid any further damage, as our team also does maintenance for the entire garage door system. At STI Garage Door, we always aim to satisfy our customers. Our team puts in 100% effort on all replacements. So you can expect only the best when you work with us.
Contact us to repair or replace garage door panels. Our professional services are available at any time. We will have your garage door panels looking brand new again.
Final Thoughts
Garage Door Service
Garage door panels can be damaged over time. There are so many reasons for changing the garage door panels. Whether you have huge dents or the panels are wearing out because of age, changing them on time is a good way to prevent the garage door from being damaged. When removing the old panels, make sure you stay safe to avoid any injuries.
Once you learn how to remove garage door panels, you should be able to do it with ease. Buy new panels before you start work. Take measurements to make sure everything fits properly. When putting in the new panels, paint the garage door so that it appears brand new. If you need help with double garage door replacement panels in Ashburn, VA, get in touch with STI Garage Doors. Our experts will replace your panels at a great price!

- Garage Door Insulation Service
- Garage Door Opener Repair Service
- Residential Garage Door Maintenance and Preventive Services
- 14 Best Ways to Repair and Replace Garage Door Opener Motor
- 10 Spring Cleaning Tips for Your Garage and Organizing Its Space
- 3 reasons why recommend you to change your old electric garage door opener
$150 off Double Door